Tutorial – How to install a driver
Drivers are software files that you can not just download (eventhough this is always a necessary step ;) ) you have to install them on your computer.
You must note that drivers are usually compressed into .zip or .rar files to reduce their size and so they are easier to download.
Therefore before installing it, you have to decompress the file.
Step 1 Create a folder
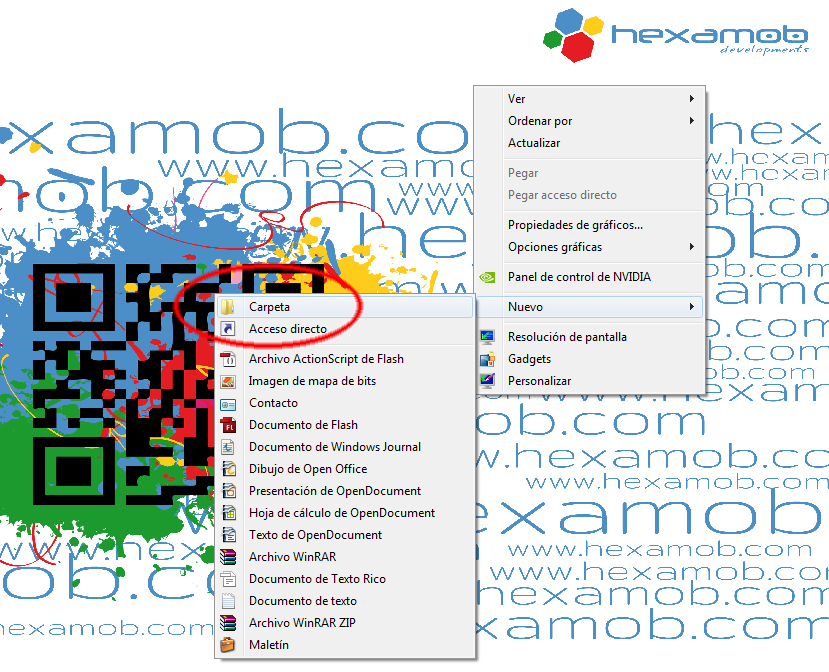
At Hexamob we recommend that you create a new folder in your Desktop (right click on the Desktop, hit the word NEW and click on FOLDER) and that you name it “drivers”.
Later on it will be easier to save the files here.
Step 2 Extracting the compressed files.
There are 2 ways to decompress a file
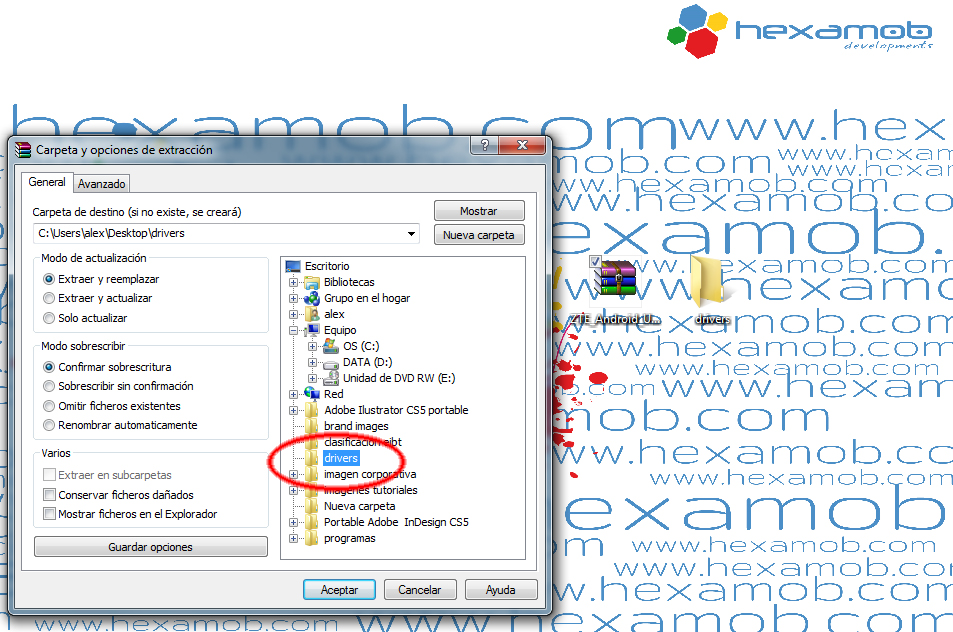
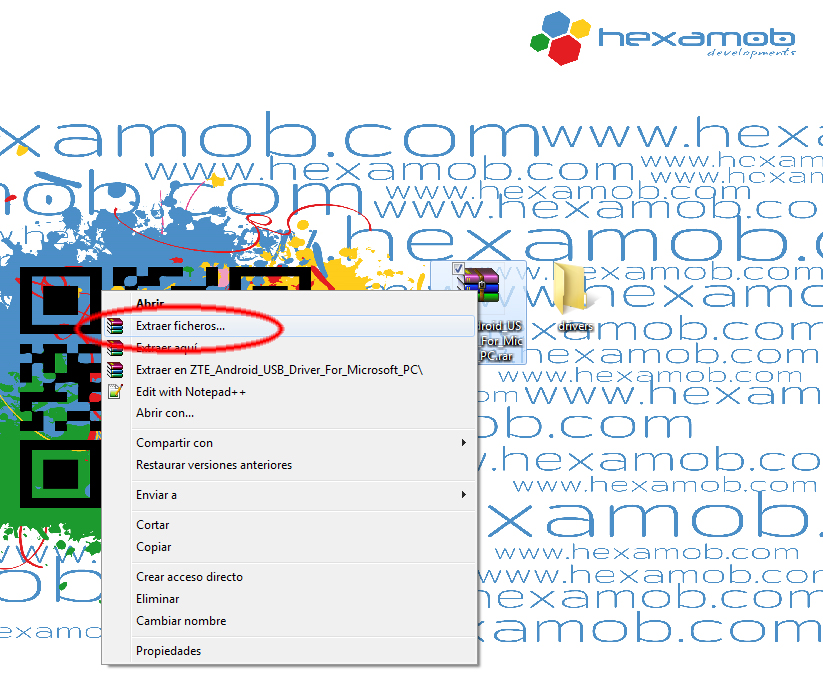
- Run the decompressor program and click on the “Extract” button that will appear in the menu. A window will open requesting that you select where you want to extract the files to. Select the “drivers” folder and click on the Accept button.
- Right click with the mouse button on the downloaded driver icon and select the option “Extract in…”. Select where you want the files to be extracted and click on the Accept button.
Step 3 Installation.
Depending on the software generated by the manufacturer, drivers can be installed automatically by running an installer or it can be done manually. Below are the two methods step by step.
Install the driver with an executable file .exe.
This is the option most chosen by driver manufacturers to install their software. Below you can find the details.
Once you have unzipped the file, run the .exe file, which is usually named install.exe, setup.exe or installer.exe. The name will always have an .exe extension.
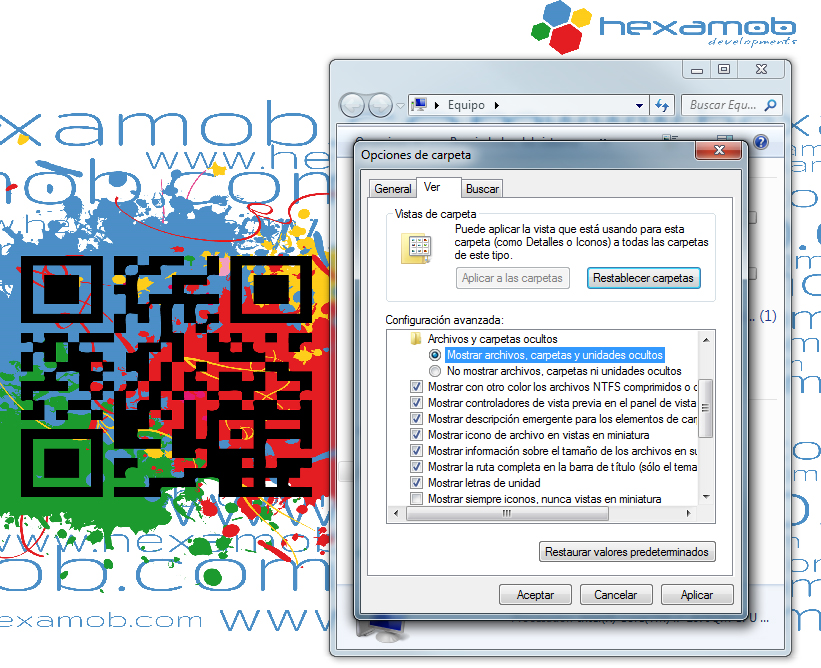
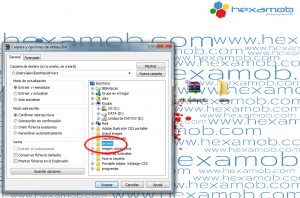
To view the file extensions (if they do not appear) go to the folder where we unzipped the drivers and select organize -> folder options and search. This will open a new window where you must search and uncheck hide file extensions.

Once you have identified the .exe file, double click on it and a window installation will open, and you will just have to follow the instructions on the screen.
Install a driver manually
In some cases the software does not have any executable file. In these cases a Manual Installation must be used.
-
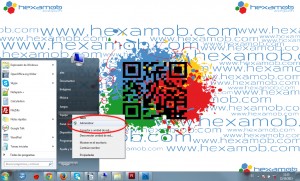
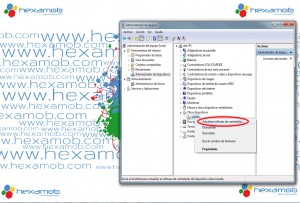
Connect the device with a USB cable to the PC and click on the start menu, then right click on “My Computer” and select “Manage” from the pop-up menu.
-
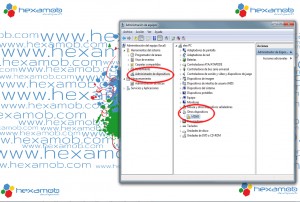
A window will appear with various options and columns. In the first column select “Applications Administrator”. This option will show you the devices connected.

-
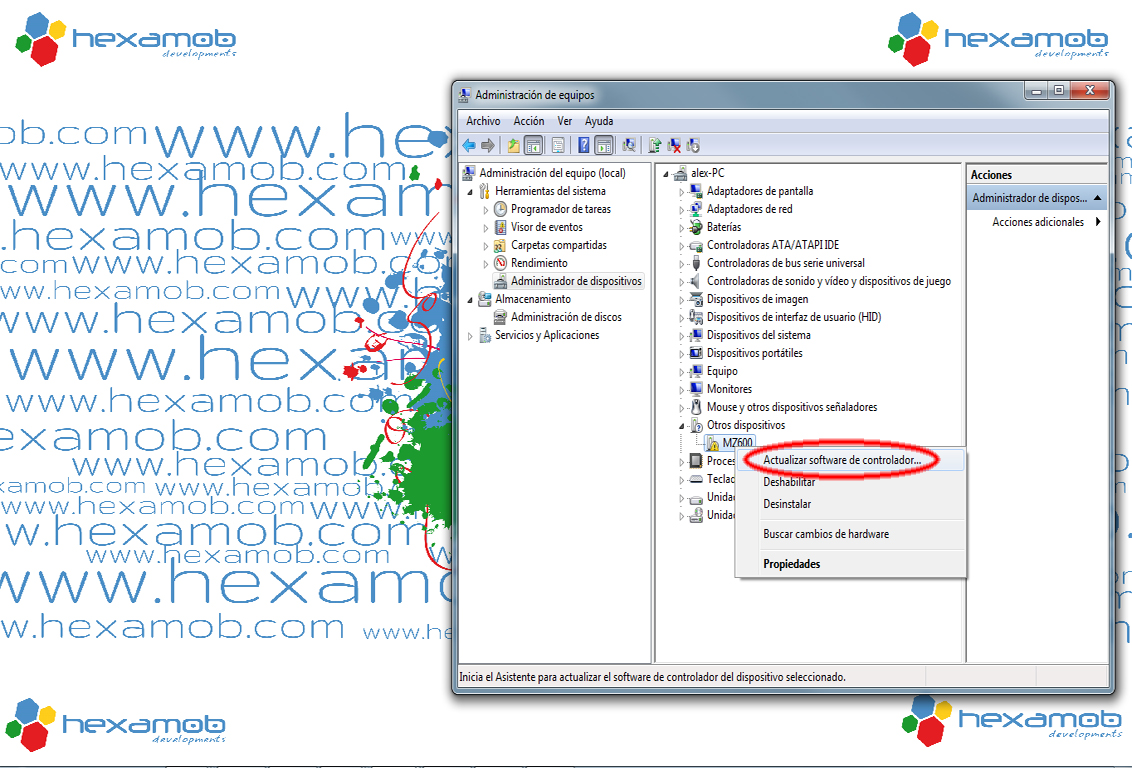
Search for the device you are installing. In this case we are installing a MZ600 model tablet. Note how the drivers are not correct. This is indicated by a yellow triangle with an exclamation point.
-
Select the device and then right click and select “Update Software” in the pop-up menu.
-
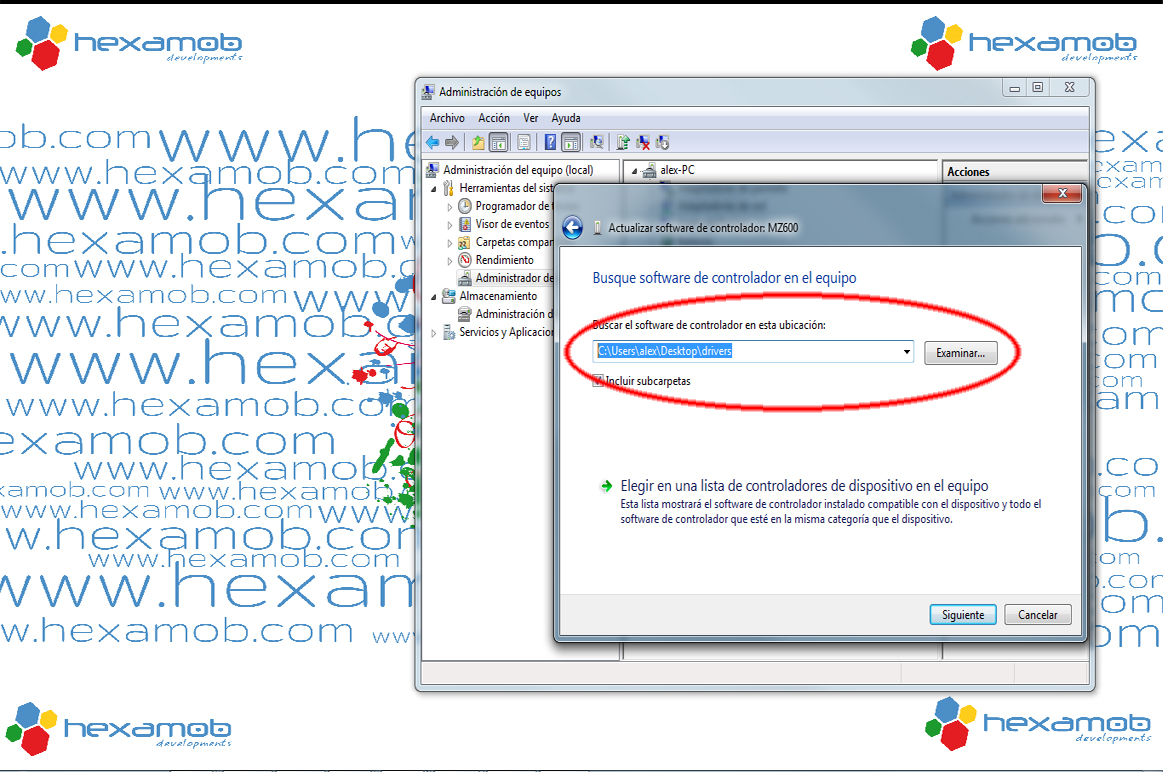
A window will appear with 2 options. Select “Search driver software”

-
The window will request that you select the folder where to install the drivers, so click on “Browse”. A new window will open and you will browse for the folder “drivers” where you have unzipped the initial download and you will click on Accept. Then click Next.

- 7.- Wait for the driver to install. When this process is finished, a window will appear saying that Windows has updated the software of the driver correctly. Select Close.
-
To make sure the installed driver is the correct one, search again for the device MZ600 and confirm that the yellow triangle with an exclamation mark no longer appears.
- The driver of your tablet is installed and the device is working properly.