Root Android 7.0 (N) for any phone and tablet
If you want to root your smartphone / tablet with Android 7.0 (known as N or Nougat) or unlock the bootloader of your device here you can find the steps to make it. Rooting your device, you can download applications that require root access (such as those that reduce battery consumption), uninstall all the unwanted applications (bootware) on your smartphone, and more.
1 – To root Android 7.0 you must remember before you start to do some preliminary steps, these are:
Keep the battery charged, at least 70% (but it is always advisable to charge up to 100% before installation for any problems that may arise).
2 – Follow all the steps listed in this tutorial in the same order without skipping any of them to enjoy rooting in your device.
Among a few lines you will see how to have root permissions on your smartphone or tablet running the latest Android 7.0 Nougat version.
Steps
- 3 – Go to Settings in your phone.
- 4 – Click About phone.
- 5 – Make click for 7 times over “Build Number”. It will be visible “Developer options” menu in Settings.
- 6 – Press back button and click “Developer options” in Settings.
- 7- Connect your phone with PC using an USB data cable.
- 7 – Into “Developer options” click over “Enable USB debugging” option.
- 9 – In your PC browser go to https://autoroot.chainfire.eu and click “Fastboot flashable devices” link.
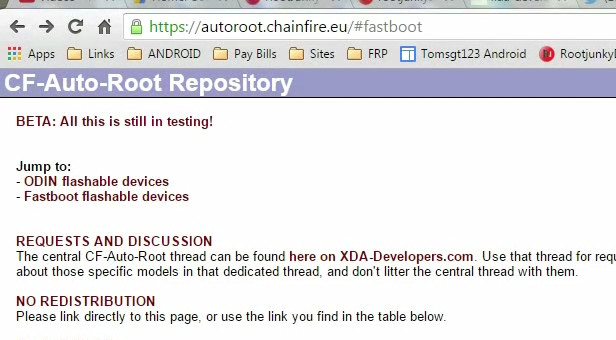
- 10 – Search your device in the list and click “download” to get the required files to root it or to unlock the bootloader.
- 11 – Unzip the downloaded file in your PC.
- 12 – Disconnect USB cable from your phone.
- 13 – Go into fastboot mode in your phone. To make it, turn off the device completely and then press and hold the Power button and the Volume Down button for a few seconds and fastboot screen will appear.
- Connect your phone with PC using an USB data cable.
Download USB DRIVER for Android
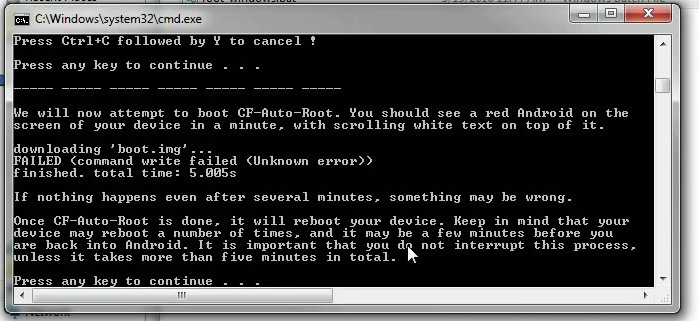
- Go into the uncompressed folder and run root-windows.bat or root-linux.sh…depending on the OS of your PC and press any key in the PC keyboard. If you see a warning “downloading ‘boot.img’ FAILED it means you must unlock your bootloader before to root your phone. If the warning is not shown the root process will run without problems and you will get rooted your device. The rooting process will be finished (Your device could be rebooted, don’t worry).
- (Only for users with locked bootloader):
In the “Windows terminal” you must run a command line. To make it, drag&drop fastboot-windows.exe (or other OS version file) to the “Windows terminal”, append boot after the path of the executable file and then drag&drop CF-Auto-Root-xxxxx.img file from image folder.
Example final path to get: …\cf-auto-root\tools\fastboot-windows.exe boot …\cf-auto-root\image\CF-Auto-Root-xxxxx.img
When the process finish your phone will be rebooted and it will be rooted.
Also you can to use the Magisk Method , for root Android 7, this method hides the root in applications that detect it.
Remember, you must ROOT your Android device at your own risk.
Legal conditions
Hexamob is not responsible for any damages caused directly or indirectly by a rooting method. Any action for rooting your device is done it only under your responsibility.
We recommend that you read all the instructions related to each root method and follow them step by step as indicated by the developers. If you have any question or need support, on every page there are links to the developers of each method.