How to ROOT your Android
How to ROOT your Android
The software of mobile device provided by the manufacturers is not fully open to users. That means there are some preinstalled applications that can’t be eliminated, some that can’t be install because they require access to inaccessible parts of the system, and we can’t change the ROM of the device either (the software it uses).
Why rooting your device?
If we want to do any of these actions, we need to become superuser, or root, which is something like having administrator permissions on our Windows PC. Once we have obtained these permissions, we can make almost any change we want, even change out operating system for a custom ROM, like CyanogenMod or Paranoidandroid.

The main advantages of having one of these operating systems, are that they let you customize your device much easier, and they also provide the latest Android updates, since updates for a custom ROM are available before the manufacturers’ ones.
So, how to root an Android device?
There are several ways to root your Android device, but in any case:
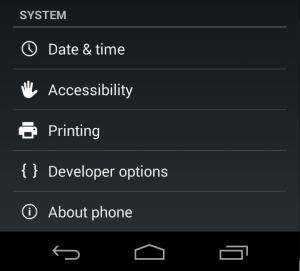
1. Make sure you have the battery charged. 2. Check “USB Debugging Mode”. To do this, you need to go to the Settings menu and therer, enter the Applications menu (if we have Android 2.1 or 2.2), and then in the Options developer. You can access to this last option in the newer versions of Android, from the Settings menu. 3. Depending on the rooting method, you may need to connect the device to a PC. If we use an APK file, this last step is no necessary, as we run the applications directly from the device. 4. Follow the specific instructions for your device.
From here on, the steps change depending on the brand and model of the device, so we need to look for the detailed instructions for each case. You may also need to download some drivers, which you will find with the installation guide.