How to install a factory image on your Nexus
Last week Google posted the factory images of Andorid 5.0 Lollipop for the Nexus devices. If you are the owner of one of those devices and do not know what to do with these files, here you have a guide that will help you to install the newest Android version.
The steps are easy, but you must consider a few things before you start. First, remember that when you install these images, you are going to lose all the information you had on your phone or tablet, so you must be sure to have a backup of all your data. If you’ve never done one, you can check this other guide on how to do backups on Android.
The second thing to consider is the battery. Before you start playing with your device, make sure to have the battery almost fully charged. Otherwise, you can find with some trouble if the battery dies halfway through the installation.
Step 1: Download the SDK image.
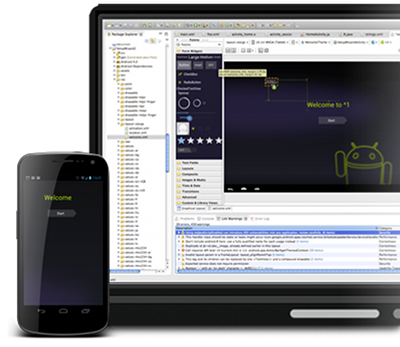
To install the factory image, you’ll need to connect the mobile device to the computer. So, the first step will be to create a connection between them. To do this, you need the Eclipse ADT bundle, ie, the Android SDK that allows you to connect your smartphone or tablet to the computer. It works with computers running Windows, OS X and Linux. The Android SDK will also help you to unlock the bootloader and to install the new files.
Once downloaded, you have to unzip and run it. If you are using Linux or Mac, you just need to follow the instructions. For Windows users, you need to verify that you have the Google USB Driver and it’s a good idea to update first the “Android SDK Tools” and the “Android SKD Platform-tools”.
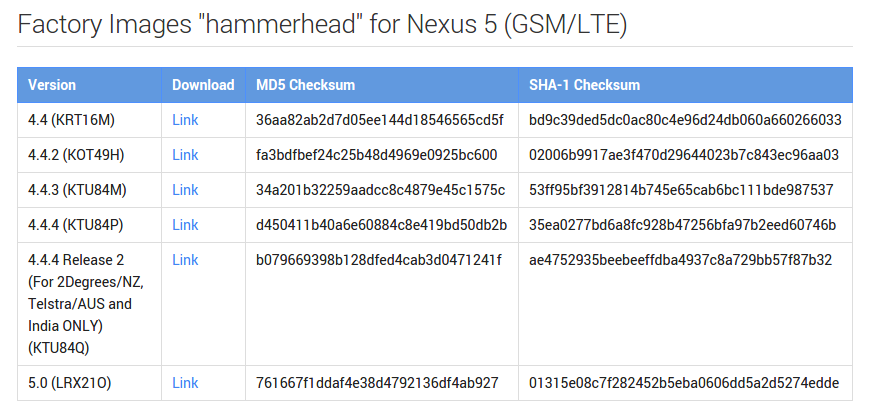
Once installed, you can download the factory image that corresponds to your specific model of Nexus. On the Google developer’s website there are all the available files to download.
Step 2: Unlock the bootloader.
Once you have downloaded the image you want to install and the device is connected to the computer, you can proceed to unlock the bootloader, the last requirement before installing the new software. To do so, we must restart in “Fastboot” mode. This is achieved by turning off the device and starting it while pressing the start button and the volume down.
Now we can copy the unzipped file that you downloaded in the “Platform Tools” folder of the SDK.
Finally, the last step to do before you can install the new version is to unlock the device. By default, most devices are factory locked, preventing that new versions could be installed. However, we can unlock it using the same tools we have use in the previous step.
If your device is locked, you will see it at the end of the Fastboot screen. If listed as “locked” means that we must first unlock it. To do this, you have to connect the device to your computer and run “fastboot oem unlock” from the Platform Tools folder. Upon confirmation, the device is unlocked.
Step 3. Install the new version.
As in previous steps, we need to access the Fastboot mode. From there, we will have to run the file “flash all”. Once launched the flash, we have to wait for a while, as all previous data is deleted and the new version of software is installed. The process can take several minutes, so you must be patient.
Once the installation is complete, the smartphone or tablet reboots automatically with the new Android version, in this case Android 5.0 Lollipop.
Source: ArsTechnica.