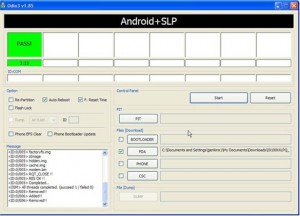
How to flash with Odin
How to flash with Odin
Odin is a PC program that allows us to flash a Samsung device. With this program we can manually install and update Samsung’s ROMs on our smartphone or tablet, in addition to flash recoveries and partitioning. However, the more common use of this software is to install official ROMs.
It is a very simple application to use and it allows us to install any official ROM from Samsung. If you want to install unofficial ROMs, you need to have the device rooted.
Files needed before flashing with Odin
Before we start flashing, we have to be sure that we have all the necessary files to avoid any problem during the installation. These are the necessary files:
1. The ROM we want to install. We can download it from the official Samsung’s website. 2. Download and install the latest version of Samsung Kies’ software, which installs the necessary drivers for the device. 3. Download and install the Odin’s version needed for our smartphone.
Preparing the device before using Odin
Before flashing the device with Odin, we need to perform some actions and adjustments to ensure that we will not have any problems during installation.
1. Make a backup of all data on your device. 2. Format the SD card. 3. Start the device in download mode. For that, we must boot the phone simultaneously pressing the home + volume down + power buttons.
Using Odin

Once the device is booted in download mode, we can connect it to the PC via USB cable. When the software detects the phone, we will see a message and we can flash all what we want.
Odin interface gives the option to upload multiple files depending on what we want to flash. We have to read carefully the instructions that accompany each ROM to know which files are needed and where to upload them.
You can find more information at AndroidPIT (Spanish).
