Root LG G Optimus G / G2 / G Flex / G PRO 2 all
REVIEW LG G PRO 2
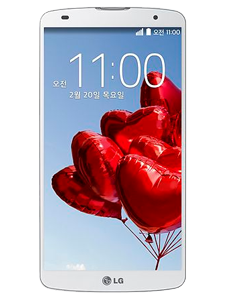
Following the current trend of increasing the size of smartphones, in February South Korea’s LG presented their new model LG G PRO 2, successor to the LG G PRO. Now with a larger and full of new features and enhancements that are committed to compete in the phablets market, currently dominated by Samsung Note range, because analysts expect this market to multiply six times by 2018.
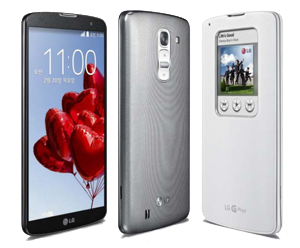
As for the new features and improvements, this LG G PRO 2 is quite satisfactory, especially considering that the previous model was a considerable disappointment. This phablet stands out because it is lighter than its predecessor (172g), and has a sharp resolution, despite having a 5.9-inch IPS screen Full HD (higher than the Samsung Galaxy Note 3). Also, it has a Qualcomm Snapdragon 800 processor, 2.2 GHz, 3 GB RAM; 3,200 mAh removable battery; KnockOn function to turn on the screen easily; front camera 2.1 megapixels and rear camera 13 megapixels with optical image stabilizer (OIS+), more natural and able to shoot 120FPS, HD and normal recording full 4K ultra HD video, as well as numerous improvements editing videos and pictures, for example with the Magic Focus feature, which allows you to refocus an image in a different area after taking it.
Moreover, among its other main features, LG G PRO 2 uses Android version 4.4 KitKat, the latest version of the Google operating system; it allows you, through micro SD cards, increasing the RAM 16 or 32 GB; it has port micro USB, support USB on-the-go and SlimPort to TV and connectivity through WiFi 802.11 a/b/g/n/ac, HSPA +, 4G/LTE, NFC and Bluetooth 4.0.
On the negative side, it lacks an innovative design, it doesn’t have FM radio, the finish of the back cover has low adherence and is not waterproof. In short, the new LG G PRO 2 is, despite these small details, the flagship of LG, for its usability and qualitative improvement of integrated mobile camera.
How to root LG G2 / LG G Optimus G / G Flex / G PRO 2
Directions
Compatible with LG G2 ( LG G2 D802 / LG G2 D802TA / LG G2 D803 LG G2 VS980 )
Compatible with LG G Pro 2 ( F350 / D837 / D838 )
Compatible with LG G Flex ( D955 / D958 / D959 / D950 / LS995 / F340 )
- Download latest IOroot zip and extract it.
- Set phone in USB Debugging mode.
- Set USB mode to Charging only(this may vary based on model).
- Run script and follow the onscreen instructions.
- If your OS is Windows: Download and install proper ADB driver. Double-click on root.bat
If your OS is Linux: cd into IOroot folder -> chmod +x root.sh -> sh ./root.sh
If your OS is Mac: cd into /IOroot/mac folder -> chmod + x root.sh -> ./root.sh
Manual Root Method
- Download and extract the latest IOroot.zip
- Enable USB Debugging.
- Open terminal/command prompt. Windows/Linux users: cd into /ioroot folder. Mac users cd into /ioroot/mac
Windows users can hold shift key, right click in ioroot folder. Select “open command window” option. -
Copy/paste commands below. Hitting enter/return after each line.
Linu-x/Mac users may have to enter ./ before adb on each line.
Example: ./adb push g2_security /sdcard/g2_security - ADB devices (make sure it sees your device; if “offline” turn on phone/unlock and accept RSA key prompt)
- Choose next line based on model and firmware version: F350K/L/S (4.4.2): adb push ytiruces_1a_kk /sdcard/ytiruces_1a
- USB Connection Mode needs to be toggled. How: unplug usb cable from phone then re-plug.
- adb shell (you should now see a # instead of a $. # = root)
- exit
- adb shell “mount -o remount,rw /system”
- adb push su /system/xbin/su
- adb push su /system/xbin/daemonsu
- adb push install-recovery.sh /system/etc/install-recovery.sh
- adb shell “chown 0.0 /system/xbin/su;chmod 06755 /system/xbin/su”
- adb shell “chown 0.0 /system/xbin/daemonsu;chmod 06755 /system/xbin/daemonsu”
- adb shell “chown 0.2000 /system/etc/install-recovery.sh;chmod 755 /system/etc/install-recovery.sh”
- adb shell “sync;mount -o remount,ro /system”
- adb install Superuser.apk
Download
Check if your LG G PRO 2 is rooted correctly using our app “How to ROOT”.
Download Android USB Drivers app
Download sources
Remember, you must ROOT your Android device at your own risk.
Source
Legal conditions
Hexamob is not responsible for any damages caused directly or indirectly by a rooting method. Any action for rooting your device is done it only under your responsibility.
We recommend that you read all the instructions related to each root method and follow them step by step as indicated by the developers. If you have any question or need support, on every page there are links to the developers of each method.
Android rooting method LG G Optimus G / G2 / G Flex / G PRO 2