Moto X . Root Moto X from a PC o Mac
Requirements before to ROOT your Motorola Moto X
- 1 – You must have installed the last update of your Moto X
- 2 – You must have installed the drivers of your Motorola Moto X (Windows and Mac users) .
- 3 – USB Debugging Mode enabled (it’s in Settings>Developer options
- 4 – You must have downloaded Cydia Impactor
- 5 – You must have downloaded SlapMyMoto.zip
Caution. This ROOT method is advanced and is only recommended for advanced users and always at your own risk users.
This method is independent of your carrier.
Rooting steps for Motorola Moto X
- – Uncompress SlapMyMoto.zìp and make a PUSH to your Motorola Moto X from a command terminal (Home>Run>cmd>enter for Windows users) running command
adb push SlapMyMoto.jar /sdcard/SlapMyMoto.jar
-
– Check the IP of your Motorola Moto X
adb shell getprop dhcp.wlan0.ipaddress
- – Run Cydia Impactor, select “# start telnetd as system on port 2222” and clic Start
-
– In a PC open a terminal and run next command
telnet "Motorola IP address that we got in a command befor" 2222
-
– Run
dalvikvm -cp /sdcard/SlapMyMoto.jar SlapMyMoto
-
– reboot your Android device
adb reboot
- – Repeat another time steps from Cydia Impactor and dalvikvm. After that, Moto X will reboot itself.
-
– After this reboot, we need to run another time dalvikm option
dalvikvm -cp /sdcard/SlapMyMoto.jar SlapMyMoto
-
After the fourth time rebooting Motorola Moto X we need to recover the recovery partition of the device running fastboot command
adb reboot bootloader
fastboot flash recovery recovery.img
fastboot reboot
- Motorola Moto X will reboot and then we’ve to update the device with OTA 4.4 (it must appears available via notification or into Settings>About the phone).
-
Now, we’ve to make a “DOWNGRADE” of bootloader to let Moto X to use 4.2.2 Jelly Bean bootloader.
adb reboot bootloader
			fastboot flash partition gpt.bin


			fastboot flash motoboot motoboot.img


			fastboot flash logo logo.bin


fastboot reboot -
After this new reboot we’ll be running Android 4.4 KitKat and we’ve to run
			adb push su /data/local/tmp/su


			adb push install.sh /data/local/tmp/install.sh


			adb push rec.sh /data/local/tmp/rec.sh


			adb push install-recovery.sh /data/local/tmp/install-recovery.sh


			adb push setup.sh /data/local/tmp/setup.sh


adb reboot -
Once rebooted the device, open a command terminal in your PC and run
adb shell
-
When you get a prompt shell ($ or #) from your Motorola Moto X you will be able to run command into your Moto X. So, we’ve to run next command, enable bluetooth and wait for 60 seconds to get a reboot of the Moto X…
echo "/data/local/tmp/rec.sh" > /sys/kernel/uevent_helper
-
After the reboot, we’ave to open another time a comamnd terminal, a prompt shell into the Moto X and run this new command, enable bluetooth and wait for the reboot of the device…
adb shell
echo "/data/local/tmp/install.sh" > /sys/kernel/uevent_helper
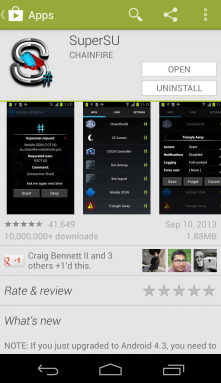
- Once the Moto X is rebooted, wait a little time to let the Moto X processes to be set up correctly and the install SuperSu.
- Congratulations! Now you must have your Motorola Moto X ROOTED correctly. :)

USB DRIVER for Android Devices

Download sources
Remember, you must ROOT your Android device at your own risk.
Other important informations to read before rooting
Caution. This ROOT method is advanced and is only recommended for advanced users and always at your own risk users.
Source
Legal conditions
Hexamob is not responsible for any damages caused directly or indirectly by a rooting method. Any action for rooting your device is done it only under your responsibility.
We recommend that you read all the instructions related to each root method and follow them step by step as indicated by the developers. If you have any question or need support, on every page there are links to the developers of each method.
PHP Code Snippets Powered By : XYZScripts.com
